
Oh, squats. Love ‘em or hate ‘em, they are an important exercise to master. A squat is what’s considered a functional exercise, meaning it’s a movement that is used to accomplish everyday activities or tasks. Whether you’re picking up your kids (or their toys), moving boxes, bending over to tie your shoes, or — dare we say it? — using the bathroom, there are countless reasons to incorporate this multi-functional exercise in your fitness routine. Knowing how to improve squat form is equally important.
Benefits of good squatting form
From the moment you started walking as a baby, squatting became an essential movement. While squatting certainly works your lower body including your glutes, hamstrings, and quads, it also leverages several other muscles to strengthen your whole body. Stabilizing your core muscles is key to proper squat form — and you want proper squat form, too, because when you do them well, squats are known to improve knee issues! That’s right: Contrary to what you may have heard, squatting is good for your knees. Many knee problems can be avoided by strengthening the muscles around your knees. Proper squat form is very important once you start adding weight to the movement, such as squatting with a barbell. A strong foundation and steady, even movement is key to protecting your joints. By practicing your squat form and adding resistance with a dumbbell or barbell, you can make everyday tasks, such as standing up from a chair, much easier.
Related: How to Do Bulgarian Split Squats
How to improve your squat form
Ready to do the dip? Let’s get our squat on.
1. Start from a strong squatting position
Before you add weights or movement, it’s a good idea to perfect your squatting technique first. Let’s begin with the set-up.
Here’s the starting position for the perfect squat: Place your feet shoulder-width apart, your toes slightly pointed out, and your weight in the heels. You should be able to wiggle your toes.
If you’re having issues with your setup, make sure to find a Coach to help! It’s important to understand that everyone is a little different. Depending on your body, you may need to slightly tweak your setup to find the best fit.

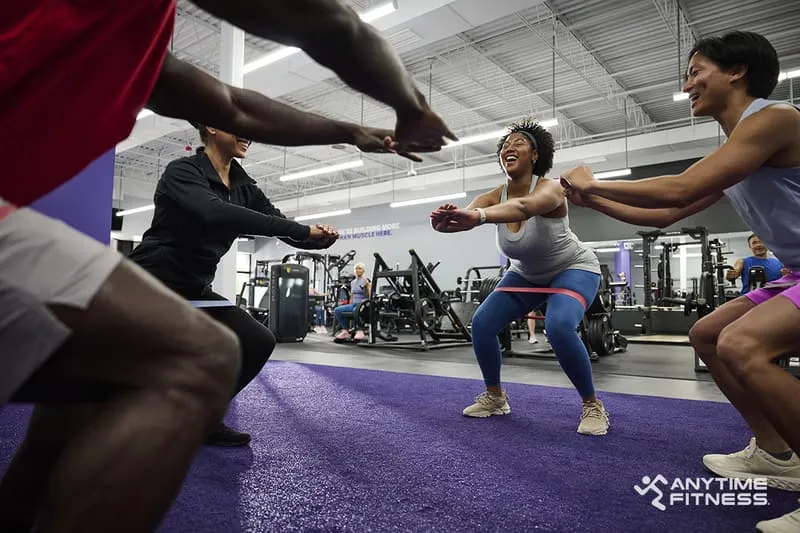
2. Squat with assistance to start
The assisted squat can be done in multiple ways. For instance, you can hold onto a door frame at your house, or you can grab a TRX strap at your Anytime Fitness gym. Having something to hold allows you to gain depth in your squat and get comfortable in your bottom positions. You also might find that getting to this position gives you a good hip stretch — bonus!
Here’s how to perform an assisted squat: In the starting squat position, hold your arms out in front of you, grasping your support. Keeping your back straight, squat down by bending your knees and pushing your hips back. Lower your body until your legs are at a 90º angle. To return to the starting position, push through your heels, keeping your back flat throughout.

3. Engage your core
The core is just as important in a squat as your legs are. Take a breath in and create tension in your core before you start any squat, engaging your core muscles as you inhale. This will allow you to properly drive from the ground and push up from the bottom of your squat with power.
4. Keep your chest tall
When starting your squat, think of pushing your hips to sit back in your squat with the weight in your heels. This will allow you to keep an upright chest and neutral spine. This position allows you to apply the most power to the ground without putting any unwanted pressure on the low back.
5. Drive your knees out
To protect the knees, you want to keep them aligned with your feet as much as possible, making sure they never drift too far out of line. When standing up from the bottom of a squat, think about driving your knees away from each other to ensure you are activating the right muscles.
6. Take your squats up a notch
After you feel confident performing an assisted squat, it’s time to transition to basic bodyweight squats. This move is the same as an assisted squat, only without anything for your hands to hold onto. You can bring your hands together in front of you in a prayer-like position, or put your arms above your head to perform an Overhead Squat.

7. Improve your ankle mobility
Ankle mobility issues can lead to other problems while squatting. If your ankles aren’t flexible enough, it can lead to your body compensating in other areas to achieve the proper depth. To increase ankle mobility and better your squat technique, sprinkle some ankle circles or any banded movement for the ankles into your warm-up —this will help increase mobility and improve your form.
8. Improve hip mobility for better squatting
The hips play a huge role in squats, which can be a problem when your hips are tight. Tightness in the hips can lead to low back issues among other problems. Work on your hip flexibility by doing controlled articular hip rotations (also known as Hip CARs) and 90/90 stretches as part of your warm-up on squat days.
9. Add t-spine mobility exercises to your routine
Keeping your t-spine (also known as thoracic spine) strong can help you stabilize any weight that you add to a squat. Exercises like Thread the Needle can help you make sure you’re achieving proper mobility through increased flexibility.
10. Add weight with barbell or dumbbell squats
After you have mastered tips 1 – 9, it’s time to add some weight into the mix. Start on the lighter end and progress with weight as you advance. It’s important that the weight isn’t heavy to the point that it hurts your form but isn’t so light that you aren’t getting a good workout.
Before you hit the squat rack, get comfortable with the Box Squat first. If you’re training for barbell lifting, start with a bare bar to start before adding weight. Otherwise, you can hold two dumbbells in both hands, held at chest height.
How to do a Box Squat: Stand upright facing away from a bench or box. With both hands, rest the squat bar on your shoulders, using your shoulders to help support the weight. Squat down to sit on the box, sending your hips back and down and keeping your feet flat. Push through your heels to return to the start position, keeping your back flat.

High-bar squat vs. low-bar squat

If you’ve spent any time researching weighted squats, you’ve likely seen these two terms — but what’s the difference? While both start at the same basic squat position with a barbell across the shoulders, the position of that bar is what makes each move different, delivering different results.
High-bar squat position

The high-bar squat is where the barbell rests on the top of the shoulders, across the trapezius muscle. Holding the bar at a higher position will require a more upright back.
Low-bar squat position

The low-bar squat starts in the same position, with the barbell resting on the upper back, across the posterior deltoid. Your feet should also be slightly turned out for this move for better stability. Squatting in this position requires a bit of a forward lean with a slight bend at the hips.
Now that you know how to improve your squat form, all that’s left is to practice, practice, practice. Squats are one of the best exercises for keeping your spine strong and your body healthy, but there are plenty of other ways you can improve everyday function — try these functional training exercises for all-over results. See you in the gym, AF Fam!