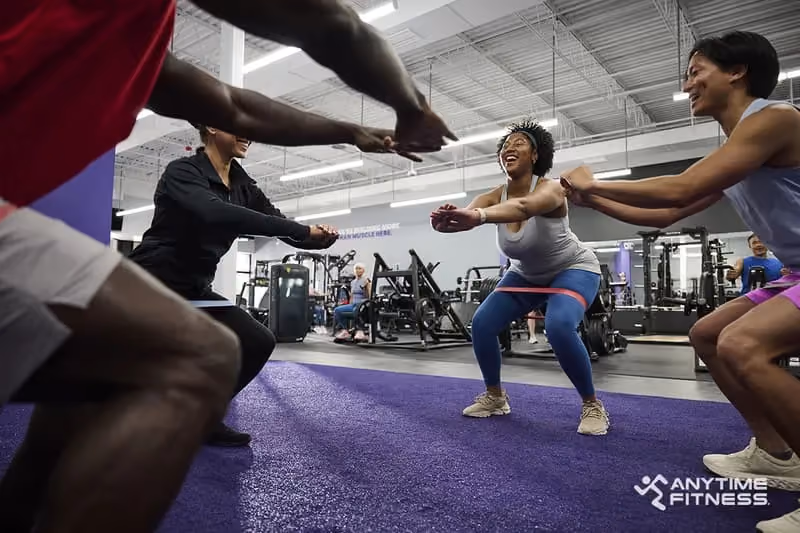

If you’ve played sports or done any sort of strength training in your fitness journey, odds are that you’ve done squats and lunges at some point. Lunges are a great lower body exercise that’s similar to squats in that it works your hips (and hip flexors), gluteus maximus, quads, hamstrings, calves, ankles, and even your core muscles, too. Talk about an effective leg exercise! Not only that, but lunges are super accessible—they can be performed with or without weights, such as a barbell or dumbbells, which means they’re perfect for home workouts or gym workouts! Whether your fitness goals include weight loss, toning up or building strength, we bet lunges have a place in your workout routine.
While there’s lots to love about lunges, the thing we love the most is they’re a unilateral movement. A unilateral movement is anything that works one side of your body, as opposed to both. For example, lunges are a unilateral exercise, while squats are a bilateral exercise. Or in your daily life, carrying a bag of groceries or pulling a suitcase is also considered a unilateral move. Because you’re only working one side of your body, unilateral exercises are a great way to build strength, because they call on your stabilizing muscles in addition to the usual muscle groups recruited. If you’ve ever almost lost your balance in a curtsy lunge, you know what we’re talking about! And since balancing so often requires your core muscles for stability, that means that every time you lunge, you’re doing your core a service, too. Double bonus!
But like many people (athletes included), most of us have likely stepped right into a forward, walking, or even side lunge without learning the correct form… because how hard could it be, right? Wrong! The problem with rushing into a walking lunge without understanding proper lunge form first is that you’re welcoming bad habits and mistakes—or even worse: injuries. Lunges seem simple—they’re just like a big step, right?—which makes it easy to perform them without thinking about proper form.
Whether you’re an athlete that wants to double-check their form, or you’re just hoping to work up to the perfect lunge, we’ll walk you through different lunge variations that you can do from the gym or at home. If you’re a beginner, or new to lunges, we recommend mastering stationary lunges before moving on to the next progression—we applaud your for wanting to learn, but don’t want you to risk a knee injury. As always, if you’re uncomfortable or unsure, consult with a personal trainer or coach first for more information! Remember: lunges aren’t bad for you, but incorrect lunges are.
Before we get into it, let’s go over some information to keep in mind while performing lunges (or lunge variations) that will not only help you get the best results out of your lunges, but also help you avoid common mistakes people tend to make throughout the different moves:
- Take a big step—but not too big! You want to step one foot out far enough forward or back that allows both knees to be at a 90-degree angle when you’re at the lowest point in the lunge, without letting your front knee extend past your toes—or front heel just to be safe. This is the part that people miss most often with lunges, and they step too far out, which prevents the rear knee from bending to 90 degrees. After taking your large step, be sure that your front foot is in front of your hip, and not in line with your back leg. This protects both bended knees and helps you keep your balance, too.
- Maintain good posture and alignment. Make sure to keep your torso upright, shoulders back, spine straight, and abs tucked in. This will also help with your coordination and stability.
- Sink deep into the lunge. When in full lunge position, the knee of your back leg should be 2-4 inches from the floor to allow your full range of motion. Be sure to disperse equal weight on the balls of your back foot and front heel when in your stance so you’re not favoring one leg.
- Don’t go too fast. One of the most common mistakes we see with bodyweight exercises—especially with athletes—is that they rush through actions. No matter what your fitness ability is, you should always be mindful and pay attention to every part of an exercise, and that means taking your time in order to get the most out of a workout.
Note: if any of these moves cause you lower body pain, consult with a personal trainer for more information before proceeding. While it’s likely that you may just need to work on your flexibility and mobility (especially in your hip flexors) for a few weeks, it could be something more serious.
You may see your fellow gymgoers performing lunges with a device such as a Smith machine—for now, we recommend that you skip the devices and weights and stick to mastering the movement. That way you won’t be distracted by other things like how much weight you’re using or your grip strength on the weights.
Stationary Lunge (Split Squat)
If you’ve never done a lunge before, the stationary lunge (also known as the split squat or static lunge) is the best place to start. It allows you to focus on maintaining good form while staying static, without incorporating too much movement.
One note on the word split: if you’ve been reading up on the perfect lunge, you may have encountered something called the split stance. While a split stance may sound like another term for a basic lunge, it’s actually a bit shorter: a split stance is about how far apart your feet would be if you were taking a regular step. It’s often used for stability in TRX exercises, but it doesn’t sink deep enough to give you the benefit of lunges.
- Standing with your feet hip-width apart, step your right foot forward, keeping it flat on the floor. Your left leg should bend and you should be on the balls of your left foot.
- Lower down so that both knees form a 90-degree angle, keeping your weight in your right heel and stabilizing yourself with your left foot. Look down at your right thigh to make sure your right knee does not extend past your toes on your right foot. Your back knee should be 2-4 inches from the floor. Tip: if you find that your front knee is extending too far forward, put your front toes against a wall. The wall will ensure that your knee doesn’t go too far!
- Press your weight down on your front heel as you stand back up, keeping your hips pointing straight ahead and your upper body upright, instead of leaning forward.
- Repeat the movement by sinking low into your lunge, then pushing yourself up, using your leg muscles. Keep your feet in the same stance for 6-20 reps before switching sides to repeat.
Forward Lunge
The forward lunge has more movement than static lunges, but not as much as the walking lunge. For the forward lunge, you will stay in one place for the whole movement.
- Get in starting position with your feet hip-width apart.
- Shift your weight to your right leg and take a big step forward with your left foot.
- As you step, simultaneously lower down into the lunge, being sure to keep your torso upright and shoulders back on the way down. Go far enough to engage your quads, but not too far that your front knee extends beyond your toes, both legs should bend at 90 degrees and your right heel should be off the ground.
- Press up through your front heel, using your glutes and hamstrings to bring you back to starting position.
- Complete 6-20 reps stepping your left foot forward, then switch to your right leg.
Reverse Lunge
The reverse lunge is very similar to the forward lunge, except that you step backwards instead of forward. Reverse lunges have been known to have less impact on the knee joints, so choose reverse lunges if you suffer from knee pain or have had an injury—or if you just seem to like them better! Different people will have different preferences when it comes to lunges.
- Get into standing position with your feet hip-width apart and shift your weight onto one of your legs.
- Step the opposite leg backwards, straight out from your hip. You should never feel like your feet are in line with each other.
- As you step, simultaneously lower down into lunge position, so that your front thigh is as close to parallel with the ground as possible.
- Power up through your front heel, stepping your back foot back to the starting position.
- Repeat for 6-20 reps and then switch sides.
Walking Lunge
The walking lunge is basically a normal lunge—just with a little extra stability and coordination work for your quadriceps and abs. It gets its name from the fact that you do it in motion—it’s essentially one forward lunge followed by the next, moving in one direction in a straight line. You can do this move with just your body weight, or you can add weight for an extra challenge. There are different ways to do this, but the most common is to hold a dumbbell in each hand and drop your arms down straight by your thighs.
- Stand in position, with your feet hip-width apart. Step forward with your right foot, squatting into the lunge. Your right knee (and left knee too) should form an angle of 90 degrees.
- Power up through your right heel and left foot to come back to standing, but instead of pausing for a 1-2 seconds here, step your left leg forward into the opposite lunge stance.
- Be sure to keep your hips pointing straight ahead; engaging your core can help with this.
- Repeat! Each forward step is one rep.
Once you master the basic lunges, you can work with a trainer or check out workout videos to start exploring other fun variations, like lateral lunges, curtsy lunges, or even lunges with a bicep curl.
For more content and information about making healthy happen, check out Coach. Care. Connect. or our social media pages by clicking the icons below!