
Cable machines can be found in almost any gym across the country, but all those attachments, cables, and levers can be intimidating to gym goers, new and old alike. Even though each machine is a little different, an understanding of the basic mechanics can help you conquer your cable fears and give you the courage to use this highly flexible machine. So let’s get back to basics!
What is a cable machine?
Cable equipment comes in all shapes and sizes. A cable machine is a large, metal structure with weight stacks that are raised and lowered with the help of a cable and pulley system. Attachments — also known as “grips” — are clipped to the cables. There are usually a few different places you can attach grips (depending on the move you’re performing), making this piece of equipment super flexible. Plus, grips come in all shapes and sizes, which gives you access to even more moves.
Benefits of using cable equipment
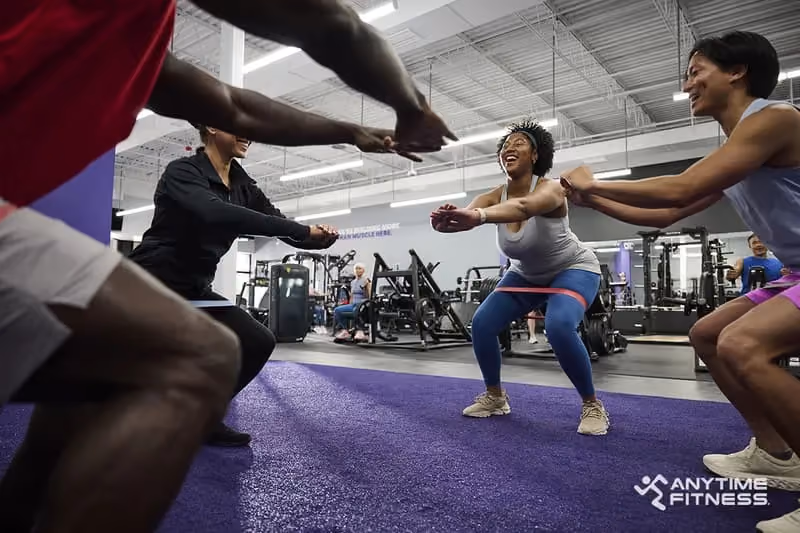
Not only does it let you perform a wide array of workouts, but cable machines are also a great way to introduce variety to your fitness routine. Because of its flexibility, it’s a great tool for strengthening your back, arms, chest, legs — pretty much any muscle group in your body.
For instance, if you’re a frequent free-weight user but seem to have hit a plateau, the American Council on Exercise suggests substituting cable machine workouts for your usual barbell and dumbbell lifts, and that doing so for a few weeks can help you overcome your plateau. It’s that consistent tension that’s needed to lift and lower the weight stacks that makes cable machine workouts such a good fit for strength training.
Cable machines are also known as the most versatile equipment at the gym because they can be used to target several parts of the body. The cable you connect to, the attachment you choose, and even the way you grip can influence what muscles feel the burn.
These exercises are ideal for any type of functional movement — so ideal that cable machines actually go by a second name: Functional trainers. From improving your golf swing to giving you strength to carry all your groceries in one trip, the benefits of working out using cable equipment are unending.
Adjustable vs. stationary pulley systems
There are lots of points on a cable machine to attach your grips, with some machines having fixed points and others having adjustable pulleys. The adjustable pulley system will give you a wider range of muscle-targeting options. If you’re using an adjustable system, you will want to keep the pulley at your height or below for upper-body exercises.
What’s the deal with all these cable machine attachments?

One reason gym newbies tend to shy away from cable machines is because of all those attachments — and we don’t blame you! Having options is nice, but without knowing what’s what, it can also be intimidating. From straight and wavy bars to ropes and straps, there’s a lot to understand before you even begin your workout.
While grips come in all shapes and sizes, there are essentially six main types of cable attachments:
- Lat bars
- Tricep ropes and bars
- Curl bars
- Hand grips
- Row handles
- Ankle straps
The grip shape, design, and weight of each will vary by brand. You may have even noticed some new grips showing up at your local gym as newer ergonomic designs hit the market. Each grip serves a specific purpose and generally targets a different muscle group. Let’s start with the most popular attachments:
1. Lat bar

The lat pulldown bar, named so because it targets the latissimus dorsi muscles, is long and slightly bent at ends, hooking to the cable machine at its center point. Doing lat bar exercises can produce incredible strength results for your upper body.
Where do I put my hands when using a lat bar?
There are a few ways to grip the lat bar. While all will work your back, each position targets a specific muscle group in your back. The most common hand positions are:
- Wide grip: A wide positioning will give you the most muscle activation. Your hands should be about 1.5 shoulder-widths apart.
- Close grip: With your knuckles facing toward you, grip the bar with your hands shoulder-width apart.
Which way should my hands face when using a lat bar?
Whether your knuckles are facing toward or away from you will also change muscle targeting. Switching hand positions is also a great way to add variety to your routine to avoid the dreaded plateau.
The overhand grip will strengthen your upper lat muscles, while an underhanded grip will target — you guessed it — your lower lat muscles.
Lat bar exercise: Lat pulldown
The lat bar is most commonly used for the lat pulldown move, a workout classic. To do this exercise, you’ll first need to attach the lat bar to the overhead cable. To start, choose a weight that’s comfortable but challenging. This move can be performed seated or standing, depending on your cable machine.


- Using a wide grip (1.5 shoulder-widths apart), grasp the bar, your arms extended straight overhead.
- Bending your elbows, pull the bar down in front of yourself until it’s level with the top of your chest.
- Straighten your arms fully, returning the bar to the top position. Repeat.
2. Tricep ropes and bars

When free weights aren’t delivering the kinds of gains you’re looking for, that just means it’s time to get your hands on a tricep rope or bar attachment. The tricep bar grip is short and straight while the rope grip is U-shaped; both have stoppers at either end to keep your hands from slipping. These two-handled grips help you target the triceps brachii muscles that run along your upper arms, but can also be used to train your biceps, forearm muscles, traps, and more.
Rope exercise: Tricep rope extension


This move is what the rope attachment was made for. Attach your grip to the upper cable to start. Move your arms fluidly and slowly to keep that constant tension.
- Stand upright, holding the rope with both hands at chest level with your elbows bent.
- Pull the handles down, fully extending your arms and keeping your shoulders and back steady. Your hands should finish at the top of your thighs in the downward position.
- Return your hands to your chest. Repeat.
Bar exercise: Tricep press-down


Performing this move with a bar rather than a rope will mean your hands are in a different position. This will slightly change which muscles you’re targeting. Attach the tricep bar to the above cable as before.
- Stand upright with your elbows bent, gripping the bar in an overhand position with both hands. The bar should be around hip-level.
- Pull the bar down, fully straightening your arms and keeping your shoulders and back steady. Your hands should finish around the top of your thighs in the downward position.
- Bend your elbows, returning your hands to your hips. Repeat.
Coach tip: Using an open-handed grip — where your thumbs are in line with your fingers, not under the bar — can add support in your wrists.
Bar exercise: Bicep cable curls


Remember how we said the tricep grips weren’t just for triceps? This classic move is a perfect example of how flexible cable equipment can be. By attaching the grip to the lower cable instead of the upper, you can change which muscles are getting a workout.
- Stand upright facing the weight stack. Using an underhanded grip, hold the bar with both hands at your thighs, arms straight.
- Raise the bar up to shoulder height, bending at the elbows. Be sure to keep your back straight.
- Lower the bar back to a straight arm position. Repeat.
Coach tip: Having a super-firm grip — almost like you’re squeezing the bar — helps protect your joints and also increases the number of muscles you’re activating.
3. Curl bars
Curl bars, which come in either straight or wavy designs, are a great way to improve your bear hugs — or any movement that needs bicep bulking. There’s a lot of debate in the weight-lifting community as to which design is better, but we’ll lay out the differences and let you decide.
Using a straight bar requires more supination, meaning more movement and muscle activation. The wavy bar, also known as an EZ bar, alleviates pressure on your wrists and elbows because it requires less supination.

Curl bars exercise: Cable curls


This move will target your biceps and triceps, but it’s also going to require some back and core activation, too. Start by attaching a wavy bar to the bottom cable.
- Using an underhand grip, pull the bar to your torso. Lean back slightly, keeping your core engaged and back straight, using the cabled weight as a counterbalance to your own bodyweight.
- With your wrists straight and elbows sitting slightly in front of your hips, bend your elbows and pull the bar to your chest.
- Slowly lower the bar to starting position, keeping your elbows in front of your hips. Repeat.
4. Hand grips
Hand grips are used in twos — one for each hand! This grip is usually triangular, with a hand-hold at the bottom and two straps meeting at the top. To use two grips, your cable machine will need two weight stacks for each grip to attach to. Hand attachments can help you bulk up your upper body, including your chest and shoulders.

Hand grip exercise: Cable flys


Just like it says in the name, this move requires you to make a sort of flying, flapping motion. Start by attaching each grip to its own upper cable.
- Stand between your cables, facing away from the machine. With a handle in each hand, take a step away from the machine, staggering your legs, keeping your knees bent and your chest out. Your arms should be out from your sides and elbows slightly bent.
- Bring your hands together to meet in front of your chest.
- Return your hands to their starting position, completing the “flapping” movement. Repeat.
5. Row handle

The row handle — also known as a V-grip handle — can be used with a cable machine that has a low-pulley and seat. Row handles are V-shaped and should be grabbed with your hands close together.
Row handle exercise: Seated cable row


To do this motion, you should be seated in front of the weight stack, your V-grip attached to the lower pulley.
- Keeping your spine straight, grasp the V-grip with both hands in front of you. Your shoulders can roll forward slightly, but keep your core engaged.
- Pull the shoulders back, bending your elbows until the grip meets your midsection.
- Return to the starting position, keeping your spine neutral throughout the movement. Repeat.
6. Ankle straps

The final attachment we’ll be exploring is the ankle strap or cuff. This looks just how it sounds — it’s a strap that goes around your ankle, attaching to a lower cable. This strap allows you to use the cable machine to work out your lower body, legs, hamstrings, and glutes. How and where you stand influences which muscles get a workout.
Ankle strap exercise: Hip abductors


To engage your hips, core, and butt, start by attaching one ankle strap to the lower cable. For this exercise, higher reps are better than higher weight.
- Stand parallel to the machine, with your unweighted leg closest to the machine. Grab the machine with your closest hand if you need to stabilize yourself. Start with your legs hip-width apart, your weighted foot raised, toe pointed.
- Lift your weighted leg out to your side, keeping your upper body and hips straight. Your leg should be the only part of your body moving.
- Return your leg to the starting position. Repeat.
Once you’ve mastered these basic cable machine exercises, it might be time to get to know a different kind of cable — TRX suspension cables, that is.