
Would you believe us if we told you that getting a killer upper body workout is possible with zero weights involved? Believe it! There are plenty of exercises that you can do to strengthen your arms and put them to the test—without having to lift a single barbell. Whether you’re breaking a sweat in the gym or at home, having options is key, and that’s Real AF. Read on for a workout ready to go that you can use to strengthen your upper body – using just one piece of equipment. Hint: it isn’t dumbbells!
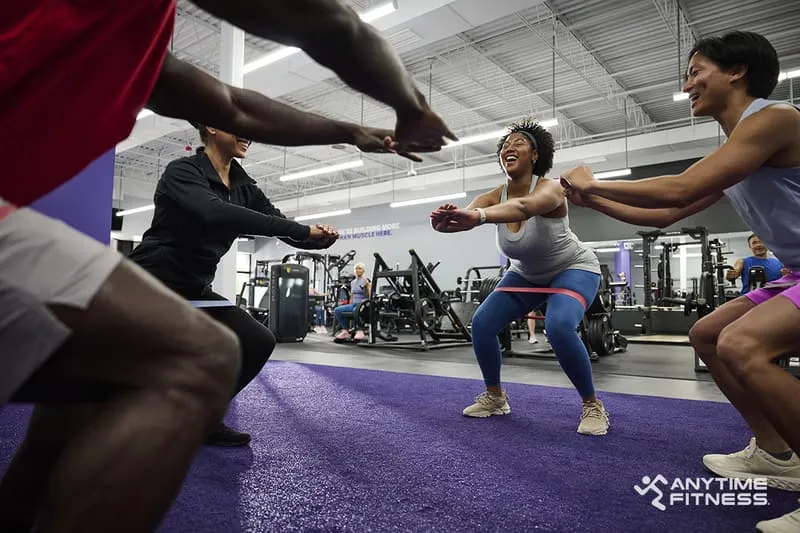
Anything is possible with Total Body Resistance Exercise– abbreviated simply as TRX. Let’s talk about using the TRX suspension trainer—yes, those long, simple-yet-daunting-looking straps that hang down in the gym with handles and foot cradles. Although still considered a piece of gym equipment, the TRX system lives in a league of its own because it’s based on two components: gravity and body weight. That means, depending on your body position, you can control the difficulty of each movement. Score! But weight… it gets even better. With the TRX suspension trainer, you can focus on strength training for specific muscle groups while simultaneously working your core, mobility, stability, strength, and balance.
TRX trainers are a handy tool for those who want to get their entire body in better shape or improve their overall performance. If that resonates with you, don’t go anywhere because we’re about to give you all the information you need to know for a killer upper body workout while focusing on strengthening and toning your arms with the TRX trainer. We strive to help turn gym-timidation into gym-spiration, and one of the most effective ways to achieve that is easy access to learning new skills. So wave goodbye as you walk past the bench and the bar: let’s try the TRX together!
Before the Straps
Whether you’re a TRX pro or a complete beginner, here is some important information to keep in mind:
- Your starting position matters! Check your feet and body position to ensure you have the proper form before starting each exercise. Your body should always mimic a plank position unless noted otherwise. Feet hip-width apart is a typical stance, but it’s not always the most effective for TRX exercises, so make sure you’re paying attention to notes on stance.
- Stabilize by utilizing your abs. One of the most common mistakes people make is forgetting to engage your core during movements; this will help keep you balanced and help you avoid injury. And who doesn’t want stronger abs?
- Practice makes perfect! Although it may look easy, TRX training can sometimes be difficult and frustrating at first, and that’s okay. Keep at it! (And remember, always consult a Coach if you have questions or are uncomfortable starting).
For assistance with form for the following moves check out the how-to video with Coach Chritian above!
You’ve got this!
1. TRX Biceps Curl
The TRX Bicep Curl targets your biceps, shoulders, back, and core. It’s more challenging for more muscle groups than a simple dumbbell curl.
Sets: 3
Reps: 12-15
Begin by grabbing the padded handlebars (not the foot cradle straps that hang down) so that your knuckles and palms are facing up.
Slowly walk your feet forward until your arms are fully extended—you should be leaning slightly back so that you’re holding the straps above shoulder height. Be sure to keep your core tight and your shoulders back to ensure that your body is in a straight line. Keep your weight in your heels rather than in your toes.
While keeping your elbows stationary, curl your upper arms and biceps to lift your body forward, bringing your knuckles towards your forehead. Hold at the top for one to two seconds.
Maintain a strong plank position and slowly lower your body back down with control until your arms are extended again.
Repeat!
2. TRX Triceps Extensions
If you’ve ever done tricep extensions on a bench, you’re going to love them on the TRX! The TRX Triceps Extension is an excellent complement to the TRX Bicep Curl since it targets the triceps on the backside of your arm while also working your biceps, shoulders, forearms, and even your calves.
Sets: 3
Reps: 12-15
Grab the TRX handlebars so that your palms are facing down.
Slowly lean forward while extending your arms out and raising your hands to the sky. Your biceps should be next to your ears. Keep your feet hip-width apart.
Pause to be sure you have good form. Your body should be in a straight line, similar to when you’re in a plank position while making an approximate 45-55-degree angle with the floor.
If all looks good, press up onto your toes to engage your core, lower body, and leg muscles.
Now, slowly lower your chest down and forward by bending at the elbow and bringing your hands back behind your head. Work to keep your elbows stationary and in line with your temples.
Bring your body back to the starting plank position by simply extending your arms.
Repeat!
3. TRX Low Rows
TRX low rows will work your upper and low back muscles while also engaging your legs, glutes, and hamstrings. This move might look intimidating, but we promise that you’ve got this!
Sets: 3
Reps: 12-15
You will first need to shorten the TRX straps all the way. If you’re unsure how to shorten the straps yourself, ask a coach or personal trainer to assist.
- Grab the handlebars and slowly walk your feet forward while leaning back until you are in a “tabletop” position with your arms fully extended and your feet shoulder-width apart on the floor. Your torso should be parallel to the floor, and your shoulder girdle (the set of bones that connect your shoulders) should be centered directly below the anchor point of the straps. Keep your feet hip-width apart or slightly wider if you need extra stability.
- Engage your glutes, hamstrings, and core as you pull yourself upwards, squeezing your shoulder blades together at the top. Also, be sure to bring your hips with you to preserve proper form.
- Hold at the top for one or two seconds, then lower yourself back down with control.
Repeat!
4. TRX Push-Up to Chest Fly
The TRX chest press and fly combine two common exercises that target your chest and shoulders: the TRX chest press and chest fly. You’ll find that the TRX chest press is very similar to a TRX push-up. Pretty self-explanatory, right? But combining the two moves and adding the TRX straps gets a little trickier and adds more challenge than regular push-ups! It’s also a great way for beginners to get more comfortable with the motions involved in the bench press.
Sets: 3
Reps: 12-20
- Grab the TRX handlebars so the foot cradles face down, and your palms face the floor.
- Put yourself in a push-up or plank position with your feet together. You should be standing on the balls of your feet rather than your heels.
- As you lower your body towards the ground (similar to a push-up), fly one arm out to the side, rotating it ever-so-slightly so that your pinky finger is towards the ground. The other arm should stay locked in the starting position at a 90-degree angle with your upper arm behind the handle. This will focus the exercise on one arm at a time.
- As you slowly push yourself up, tighten your core while bringing your arm back in so that both arms are extended in front of you.
Alternate between arms and repeat!
5. TRX “V” Flys
With the TRX “V” fly, you will use the straps to pull yourself up into the shape of the letter… you guessed it: V! This exercise is great for your shoulders, traps, upper back, and even forearms. The TRX incorporates a unique type of tension that dumbbells just… can’t.
Sets: 3
Reps: 12-15
- Start in a similar arm position to the TRX bicep curl, but grab the handlebars with your palms facing down instead. Your arms should be fully extended with your feet together while leaning slightly back.
- With your shoulders rolled back for good posture, pull your body up into a standing position by moving your arms outward into a “V” formation. Be sure to squeeze your shoulder blades together at the top while keeping maximum tension on the straps. Hold at the top for one to two seconds and remember, no slack!
Return back to the starting position and repeat.
Modifications for Back Relief
If you struggle with back problems or feel your back is overcompensating during any of these exercises, PLEASE listen to what we’re about to say…
First and foremost: if it hurts, stop what you’re doing. Certain types of pain are OK while exercising, but if pain persists, we always recommend seeking the help and advice of a professional.
However, if you’re just someone who battles non-injury related back problems or feel that the TRX trainer system is putting a little too much stress on your back, here’s a quick tip: it’s all in your feet. Say what? Let us explain…
For exercises where you’re facing TOWARDS the anchor point (where the strap is hanging from), simply kick-stand one foot backwards. For example, during the TRX bicep curl, you could step your right foot back, so that there is a slight bend in your right leg. This small modification will relieve some of the stress that was once on your lower back and redistribute to your leg. Be sure to switch which leg is back so you’re not favoring one side.
Conversely, for exercises facing AWAY from the anchor point, kick-stand your foot forward. One exercise where you could do this is the TRX push-up to chest fly. Once in the starting position, bring your left foot forward so that there’s a slight bend in your left knee.
And that’s it! This week, we challenge you to go ahead and give these exercises a try! And just like that, check another piece of your equipment check list.