
Tricep dips are for everybody, as in every body on the planet. And since there are no machines or weights needed for this awesome bodyweight move—unlike common strength training exercises that target the triceps, like the Bench Press—there’s no excuse for you not to do them!
In this article, we’ll tell you all the information you need to know about this muscle, and the myriad ways to work it until you are hip to everything tricep dip.
Tricep Anatomy
Triceps, formally called triceps brachii (Latin for “three-headed muscle of the arm”), are the large muscles at the back of the upper arm behind your biceps, and they make up two-thirds of your upper arm. We use them all the time, but, man, can they be tricky to tone. That said, it’s still necessary to strengthen them because they have very important jobs to do. Thankfully, tricep dips, which only require bodyweight, are one of the best exercises around for doing just that! Our tricep muscles allow our forearms and elbows to extend and retract. They also stabilize our shoulder joints, and because our shoulders move up, down, sideways, and around, they are, by themselves unstable. But our triceps are always there, making sure everything works out okay. It could be said that the triceps muscle is the shoulder joint’s wingman.
So let’s get into proper form and dip them to maximum durability.
What Do Dips Do?
Tricep dips, of course, work all three muscles of your triceps, but they also tone your entire upper body AND are a great way to strengthen your core. Score! If you want to have strong, defined arms, then tricep dips (when paired with other effective exercises like push-ups) are for you.
Tri It, You’ll Like It
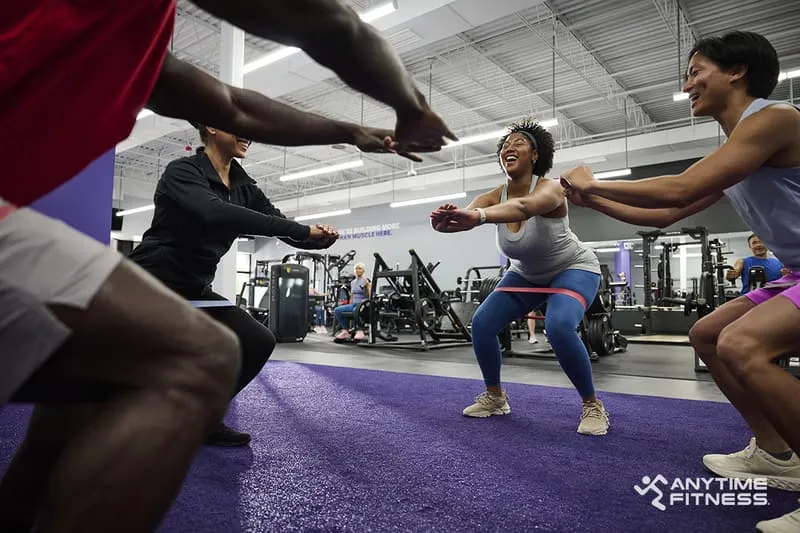
The great thing about tricep dips is that they’re equipment-free. Because you have so many options when it comes to tricep dips, the regular bodyweight dips, chair dips, elevated standard dips, weighted dip belt dips, you’re bound to find one that suits you. Just look around, other people are doing them everywhere on repeat. At the gym, in the park, on a bus bench, at the beach, on the floor… You don’t need any props like weight plates or dumbbells because it’s an incredible bodyweight exercise, but sometimes it’s nice to use a little gear to mix things up, like a resistance band. So check out the suggestions below if you want to know how to do tricep dips to dip any day, any way.
Tricep Bench Dips
Every good tricep bench dip (or chair dip) has a prerequisite start position: a stable surface like a chair or the weight bench in your gym. (The one you’d typically use for a bench press.) Place yourself in a straight arm position with your hands on the bench and face away from it, then lower your torso to a sitting position on the ground, creating a lap with your lower body, with palms down, fingers curled, and knuckles facing forward. Slide your legs forward with your feet hip-width apart, resting on your heels. In order to make this movement more challenging or easier (depending on your ability), all you need to do is adjust your starting position. To build maximum strength and to really blast your triceps, step your feet out in front of you, away from the bench with your legs in a straight line. If you’re just starting out with tricep dips, we recommend starting with your feet closer to the bench and your knees bent, as you will lift less of your body weight and can focus on proper form to prevent injury. Once your starting position is ready to go, get ready to lower your body to the floor with your hips squared.
Common Mistakes
Before you start dipping, let’s cover some important information on common mistakes that you’ll want to watch out for in order to get the most out of each rep. Remember, you can always request a workout partner to keep an eye on you, or ask a trainer for more information and form tips!
- Not going low enough. You want to make sure you’re lowering down so that the upper part of your arm is parallel to the ground and your elbow forms a 90-degree angle.
- Going too low. Lowering your body too low into the dip will put unnecessary stress and pressure on your shoulders, which can lead to injury.
- Leaning too far forward. Take care that you are always using proper form by keeping your chest high and open, and head looking straight ahead, making sure to avoid rounding the front of your shoulders or hunching forward with each movement. You’ll want to start in an upright position. Leaning forward will put too much emphasis on the muscle groups in your chest and neck and not your triceps.
- Flaring out your elbows. Sometimes, we flare our elbows out in response to the stress that our triceps are under. This might feel easier, but it makes the move less effective and can hurt our joints. Basically, it’s a big no-no! Be sure to keep your hands and elbows shoulder width apart—don’t let them fly out to the sides—to protect your joints and ensure that your upper arms and triceps are doing the brunt of the work.
- Using your legs instead of your arms. This exercise is called tricep dips, not glute or leg lifts. Really focus on lowering and lifting your body weight with your arms and tricep muscle, instead of just raising your pelvis. Remember, you’re building upper body strength, not lower!
- Going too fast. If you’re flying through repetitions, chances are, you’re not paying attention to your form; it’s also likely that you’re not getting the most out of each rep. Lower and raise yourself up with control. If the movement is too easy, straighten your legs, or keep reading for more challenging variations.
- Using an unsteady surface: If you don’t have a workout bench available, make sure you’re using a sturdy chair or other solid piece of furniture that will support you throughout this effective exercise. It should be big enough to place your hands shoulder-width apart, and sturdy enough so that you can focus on building upper body strength, rather than worrying about falling over!

Dynamic Dipping
There are simply so many ways to do a tricep dip, you’ll never get bored. From beginners to vets, the infographic below shows you all the places you can go with this move. Weights or not, bench or not, on the floor or in the air with parallel bars. The variations on the tricep dip are beyond compare. Adding weight plates for elevation, keeping your hips high for extra challenge, or supporting yourself using just your hands and arms, without any help from your lower body, are more advanced moves that can help you step up your dipping game. But those moves are nothing you can’t work up to, especially if you have a great coach or personal trainer pushing you to your edge. The popular chair dip is just the tip of the iceberg.
No matter which dip you do, it’s a great exercise, and the rules for safety pretty much remain the same from the regular dip on up. Your starting position will almost always include your hands on a stable, dry surface with straight arms in parallel straight lines. Then, depending on the exercise, keep your feet hip-width apart, chin up, chest out, and elbows straight back behind your shoulder blades. Knees above ankles at the top of the rep (not hyperextended over the ankles.) Torso square, pelvis tucked, and core tight to protect your back.
Check out the infographic below for different variations of tricep dips that you can incorporate to your next strength training session at the gym, or at home! If you want to add challenge to your tricep dips, we suggest adding more repetitions or additional weight, such as a weighted vest. Now that you know all the information there is to know about tricep dips, try them out by yourself or with a workout partner! And if you’re looking for more inspiring content to help you make healthy happen, visit our collection of blog articles.

What’s the Difference Between a Tricep Dip and Chest Dip?
The unassisted dip and weighted dip pictured above are variations on the chest dip. While tricep dips and chest dips may sound similar, the main difference between these two dip exercises is that chest dips require a dip bar. Depending on the type, a dip bar looks something like two hurdles placed next to each other. A dip bar can also be part of a dip machine, dip station or pull-up machine, by placing handles along the sides. To perform a chest dip, you place your hands on the dip bar handles, then lower your entire body down—until your elbows bend at a 90-degree angle—and then back up until your arms are straight. You may have seen gymnasts performing a similar move, called ring dips, on gymnastic rings! Chest dips are a great workout for your triceps, but as the gymnastic rings probably indicated, they’re a lot more challenging and require more grip strength and equipment than tricep dips, which is why we’re focused on tricep dips for now. If you want to try chest dips out, we recommend using an assisted dip machine to get started!
.jpeg)